Step 1: Open Appion Central
On your device, locate the Appion Central app, then tap on the icon to open.

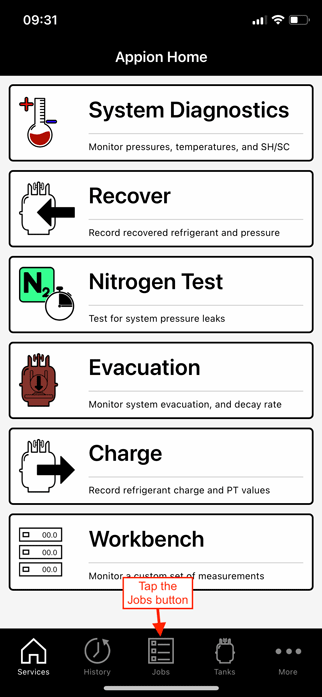
Step 2: Navigate to the Jobs Screen
From the home screen, tap Jobs to open the Job Manager screen.
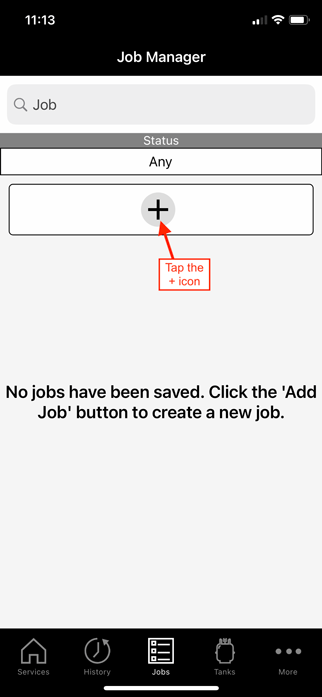
Step 3: Add a Job to the Job Manager
Tap the + icon to add a new Job. You will be redirected to the Edit Job screen.
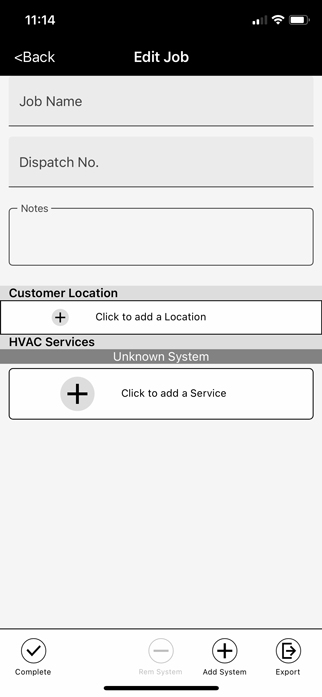
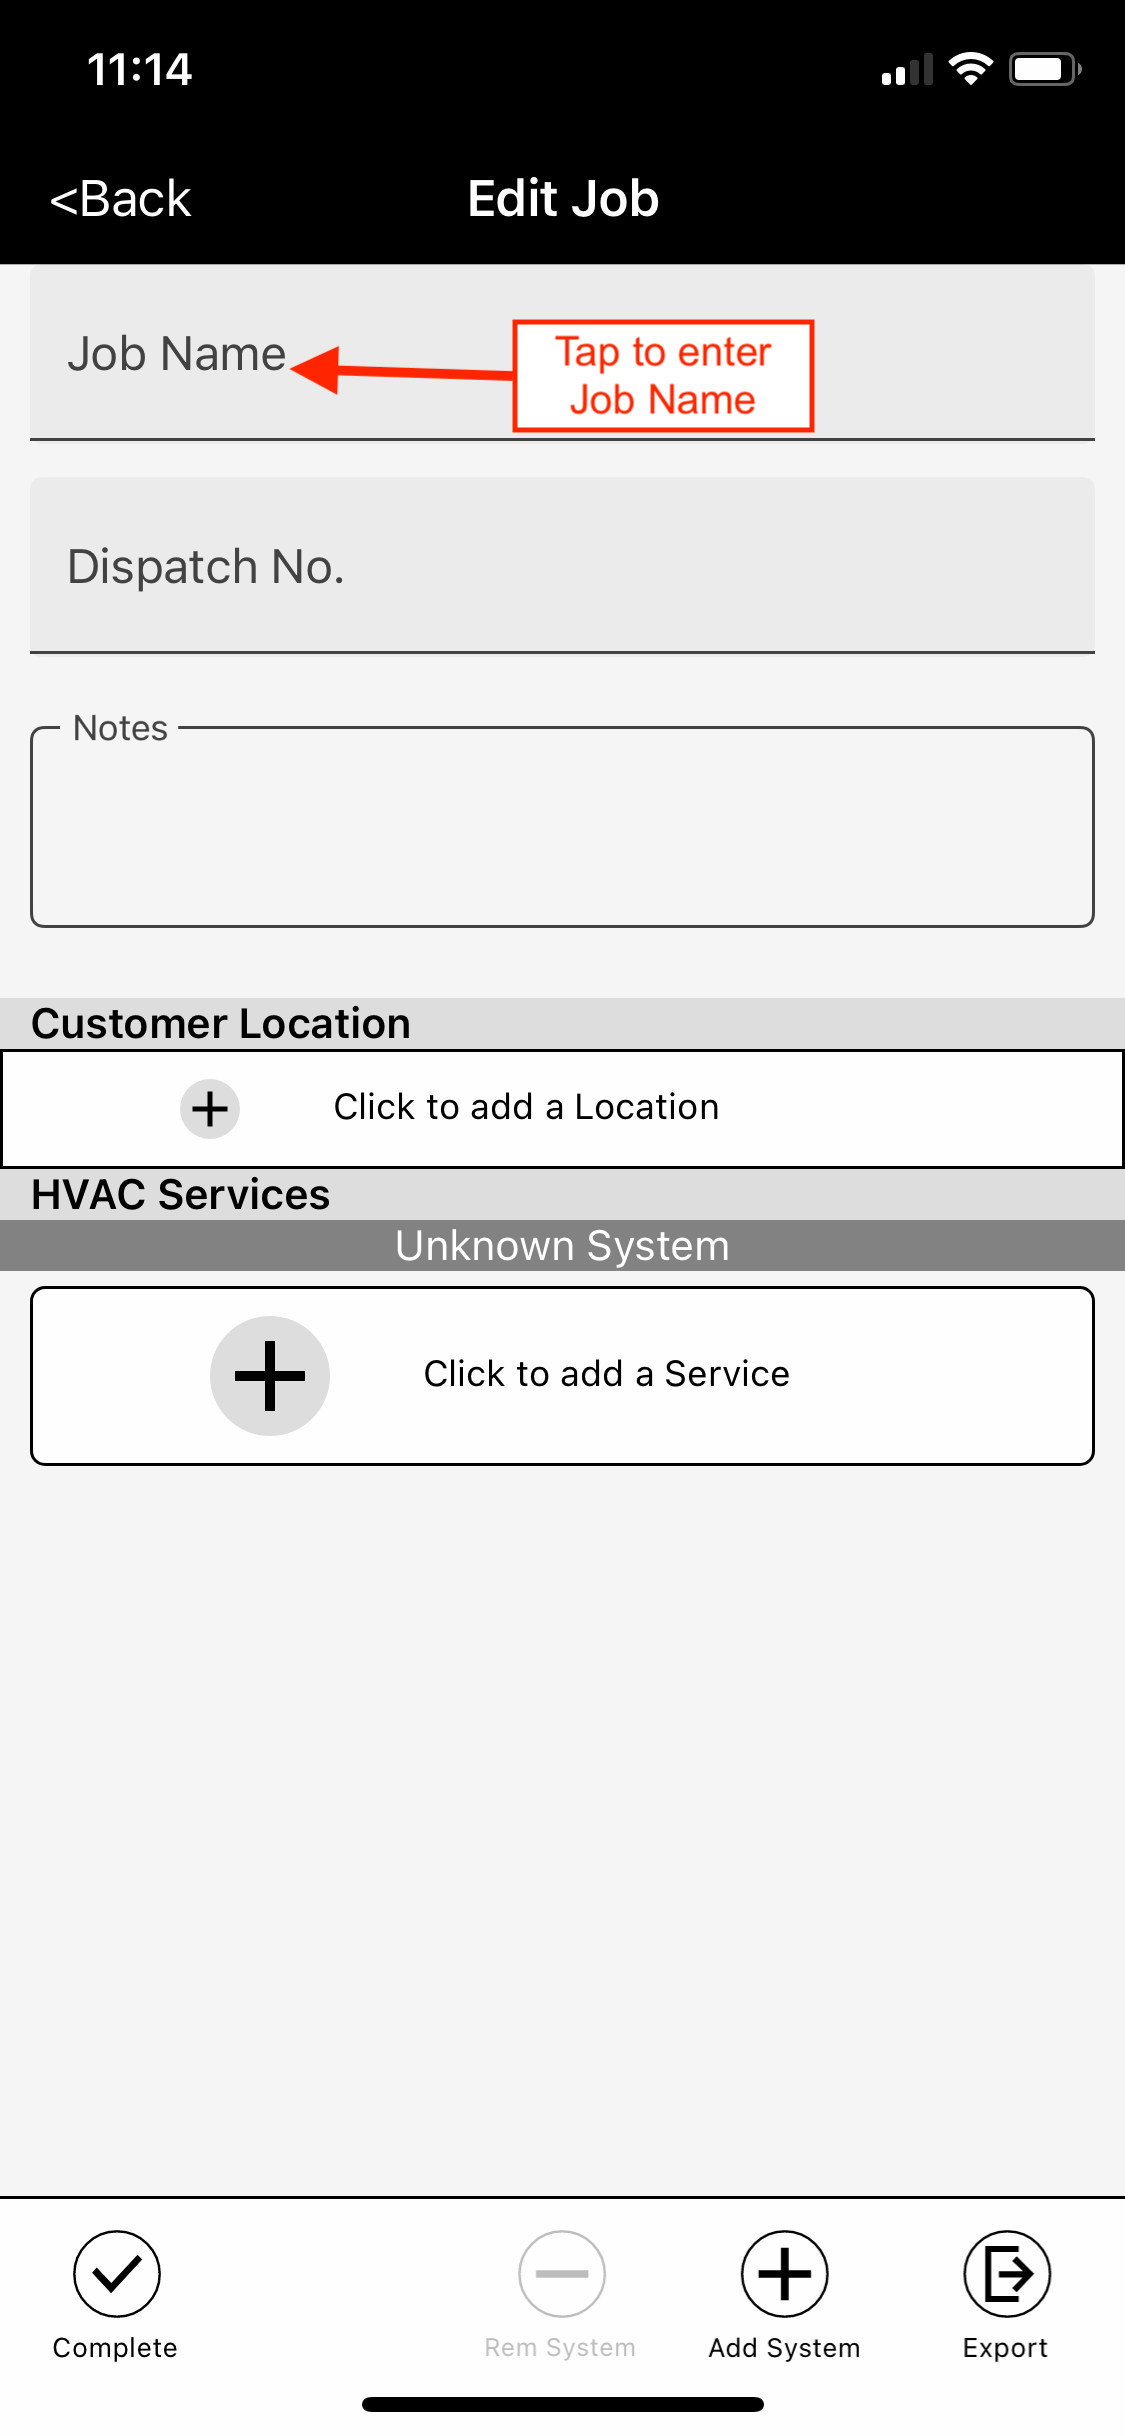
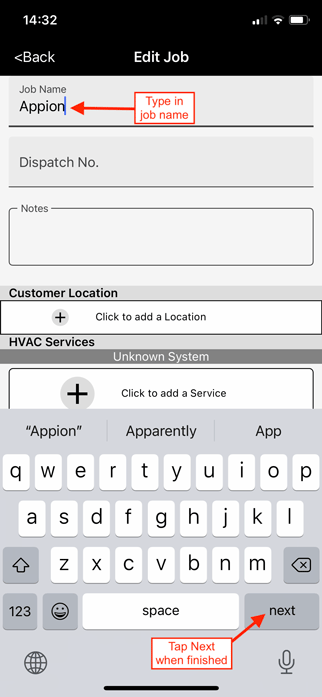
Step 4: Enter the Job Name
Tap the Job Name field and enter the job name, then tap Next. This is the only required entry to create a job.
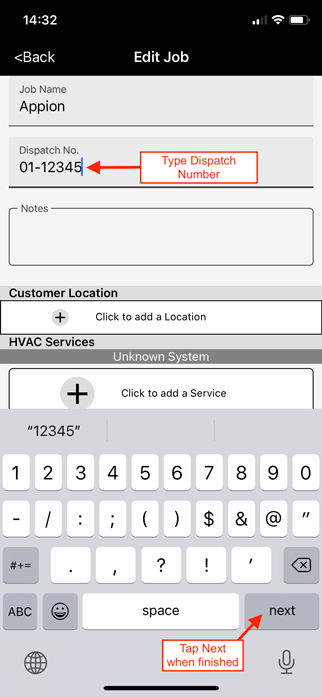
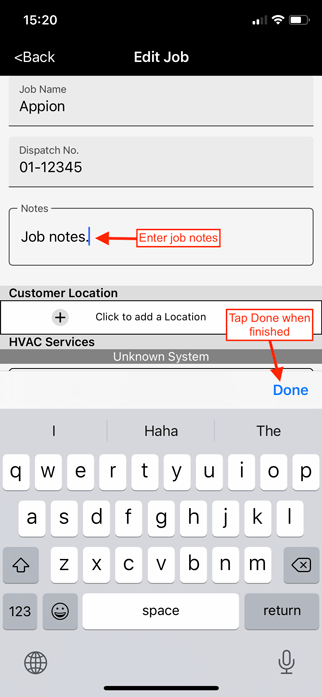
Step 5: Add Dispatch Number and Job Notes
Enter the Dispatch Number, then tap Next. In the Notes field, add any job notes, then tap Done.
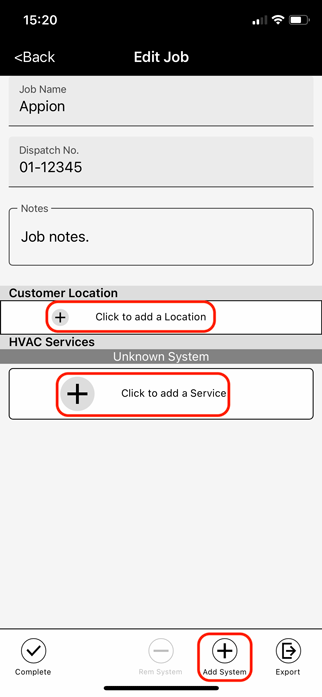
Step 6: Add a Location, Service, or System
Add any additional information to the Job by selecting the appropriate field.
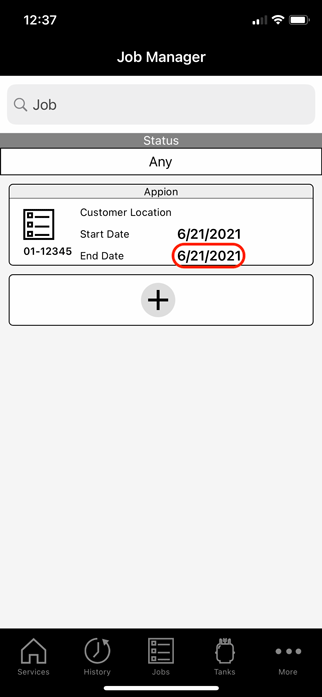
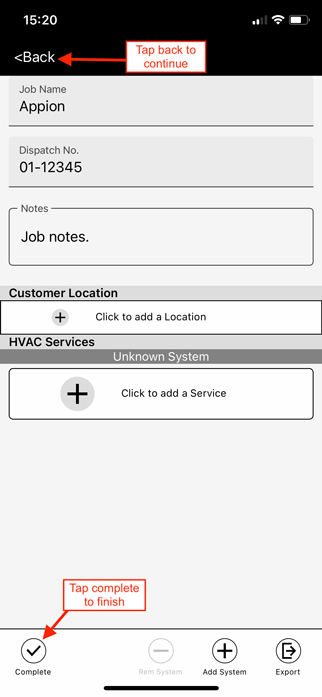
Step 7: Mark the Job Complete When Finished
Tap Complete when the Job is complete. If the job is still active, tap the Back arrow to continue additional tasks before marking the job as complete. Selecting Complete or Back will take you to the Job Manager screen. The date will auto-populate in the End Date field when the job is marked complete. If Back is selected, "Not Completed" will display in the End Date field.
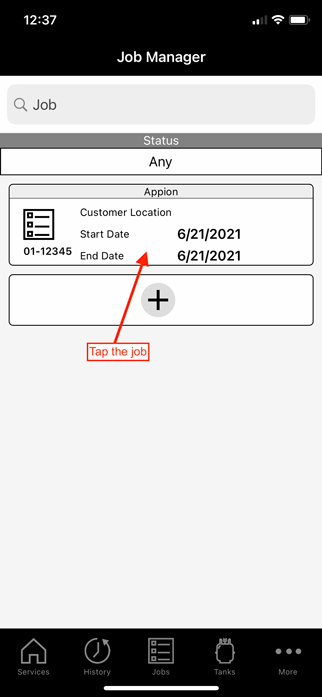
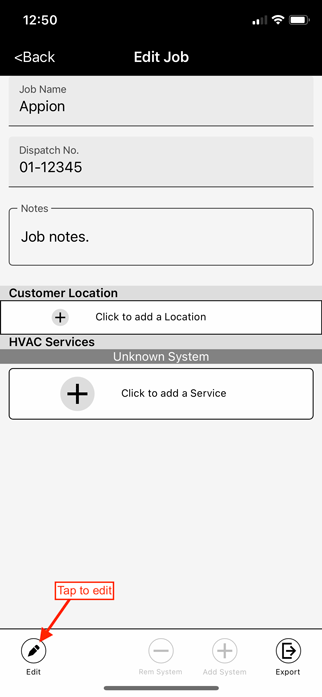
Step 8: Edit a Job Marked Complete
Find and tap the completed job you wish to edit from the Job Manager screen. Tap edit in the lower-left corner of the screen. Repeat Step 7 once editing is finished.