
Please read before proceeding: The following steps are designed for demonstration purposes only. Please refer to the values stamped onto each refrigerant cylinder when adding a cylinder to your Tank Manager. Is is strongly recommended to review all information for accuracy before proceeding with recovery using the Appion Central App. In this demonstration, a brand new, never used, multi-use cylinder designed for R-410A will be added to the Tank Manager. For more information about tank management and responsibilities, please refer to our Technical Safety Bulletin.
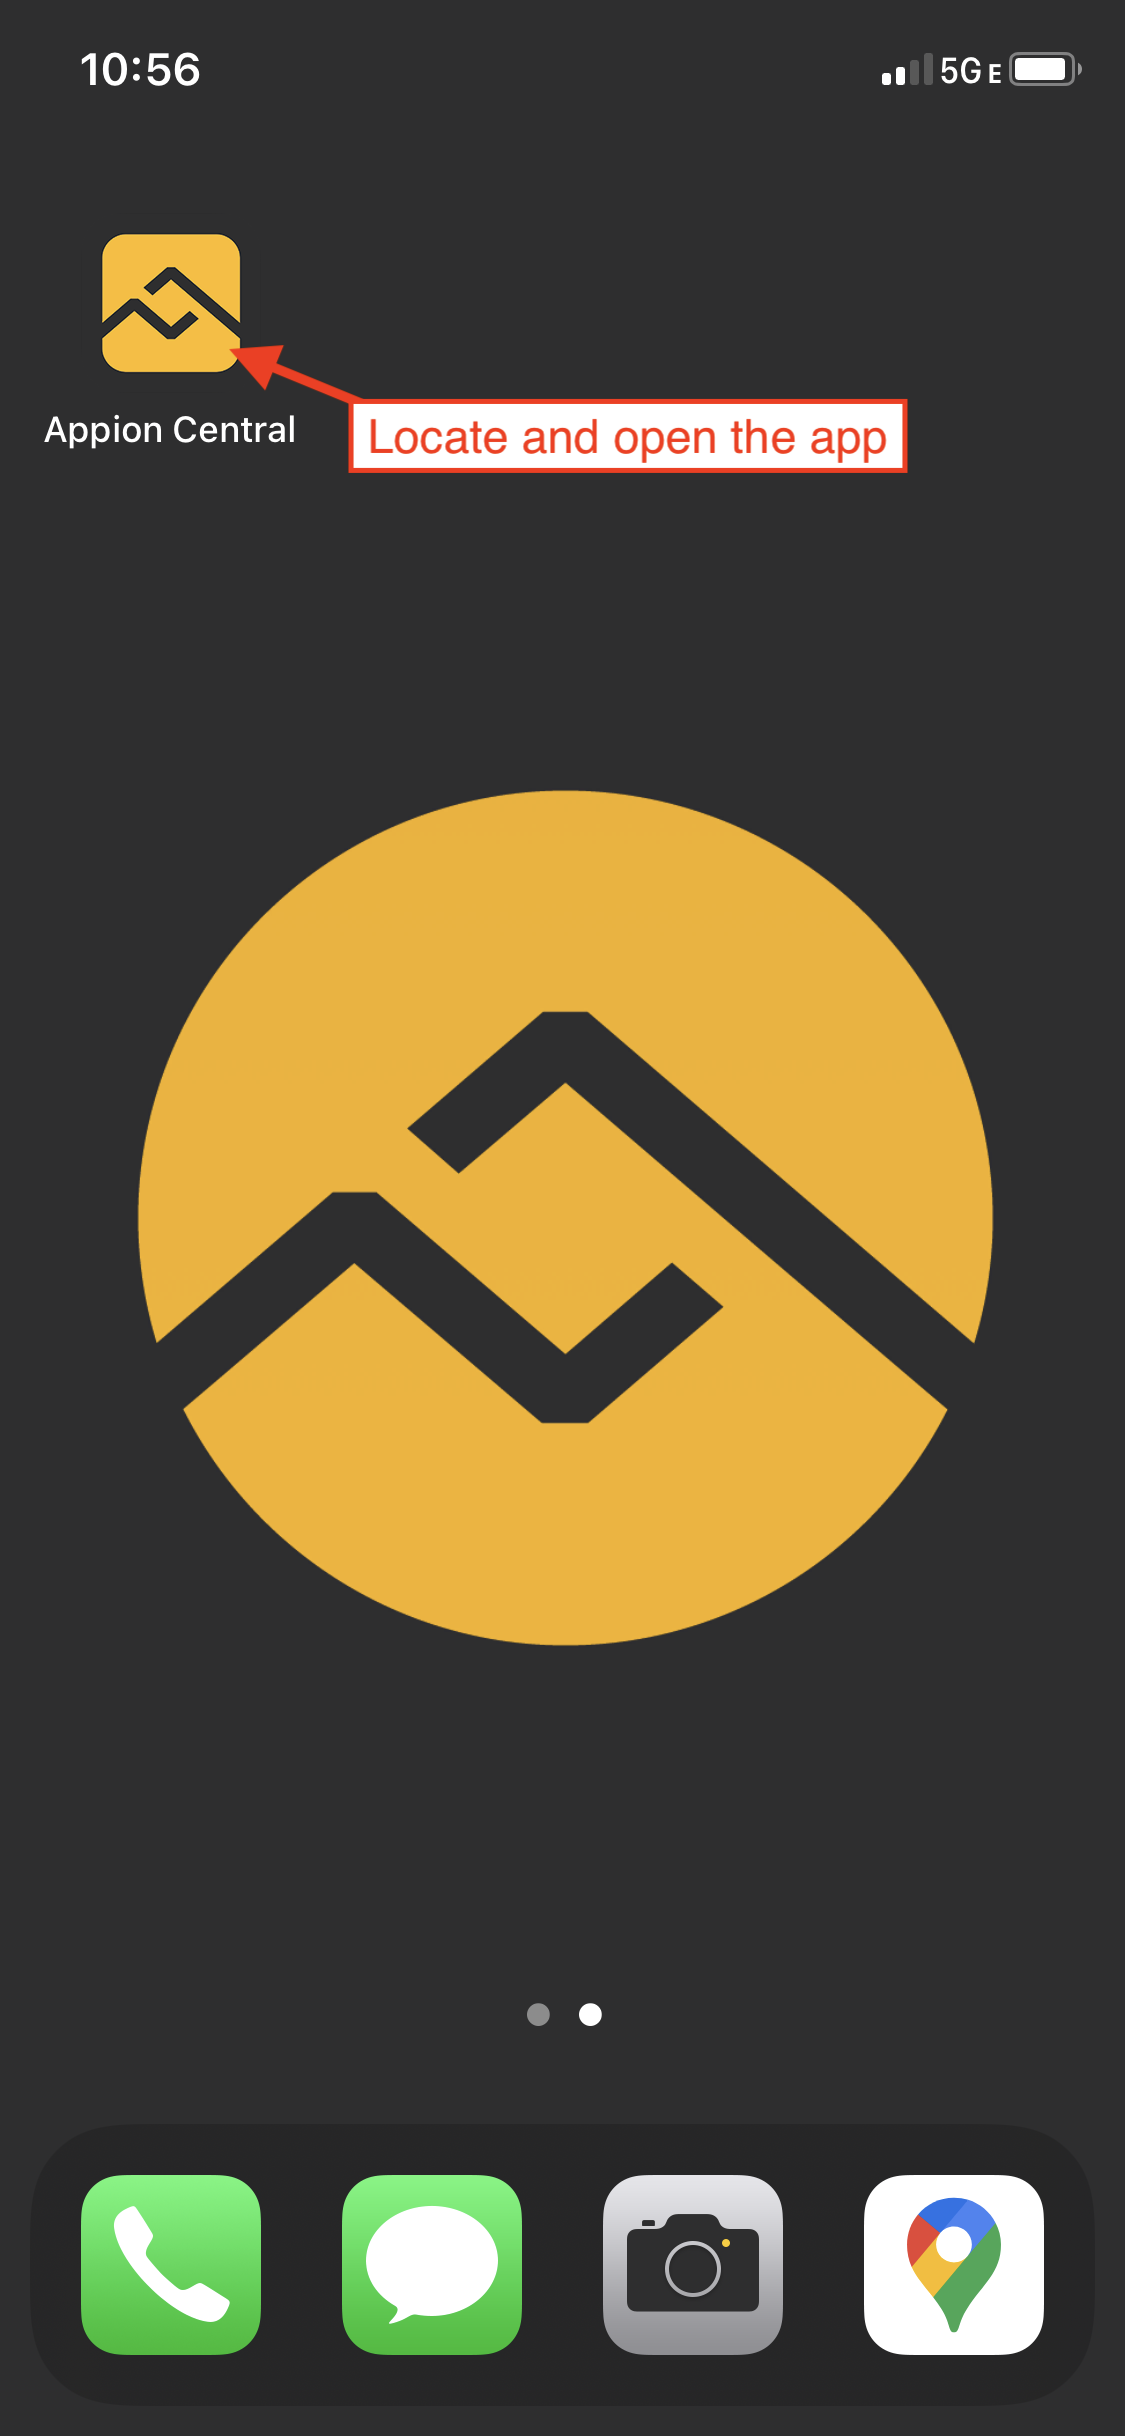
Step 1: Open Appion Central
On your device, locate the Appion Central app, then tap on the icon to open.
Step 2: Navigate to the Tank Manager
From the home screen, tap Tanks to open the Tank Manager Screen.

Step 3: Add a Cylinder to the Tank Manager
Tap the + icon to add a new cylinder. You will be redirected to the Edit Tank screen. In this demonstration, a brand new, never used, multi-use cylinder designed for R-410A will be added to the Tank Manager.
Please Note: The following steps are designed for demonstration purposes only. Please refer to the values stamped into each refrigerant cylinder and always double check your work.


Step 4: Select the Proper Refrigerant
Tap Refrigerant Manager located at the bottom of the screen. You will be redirected to the Refrigerant Manager Screen. Next, locate and tap the correct refrigerant within the Refrigerant Manager Screen.


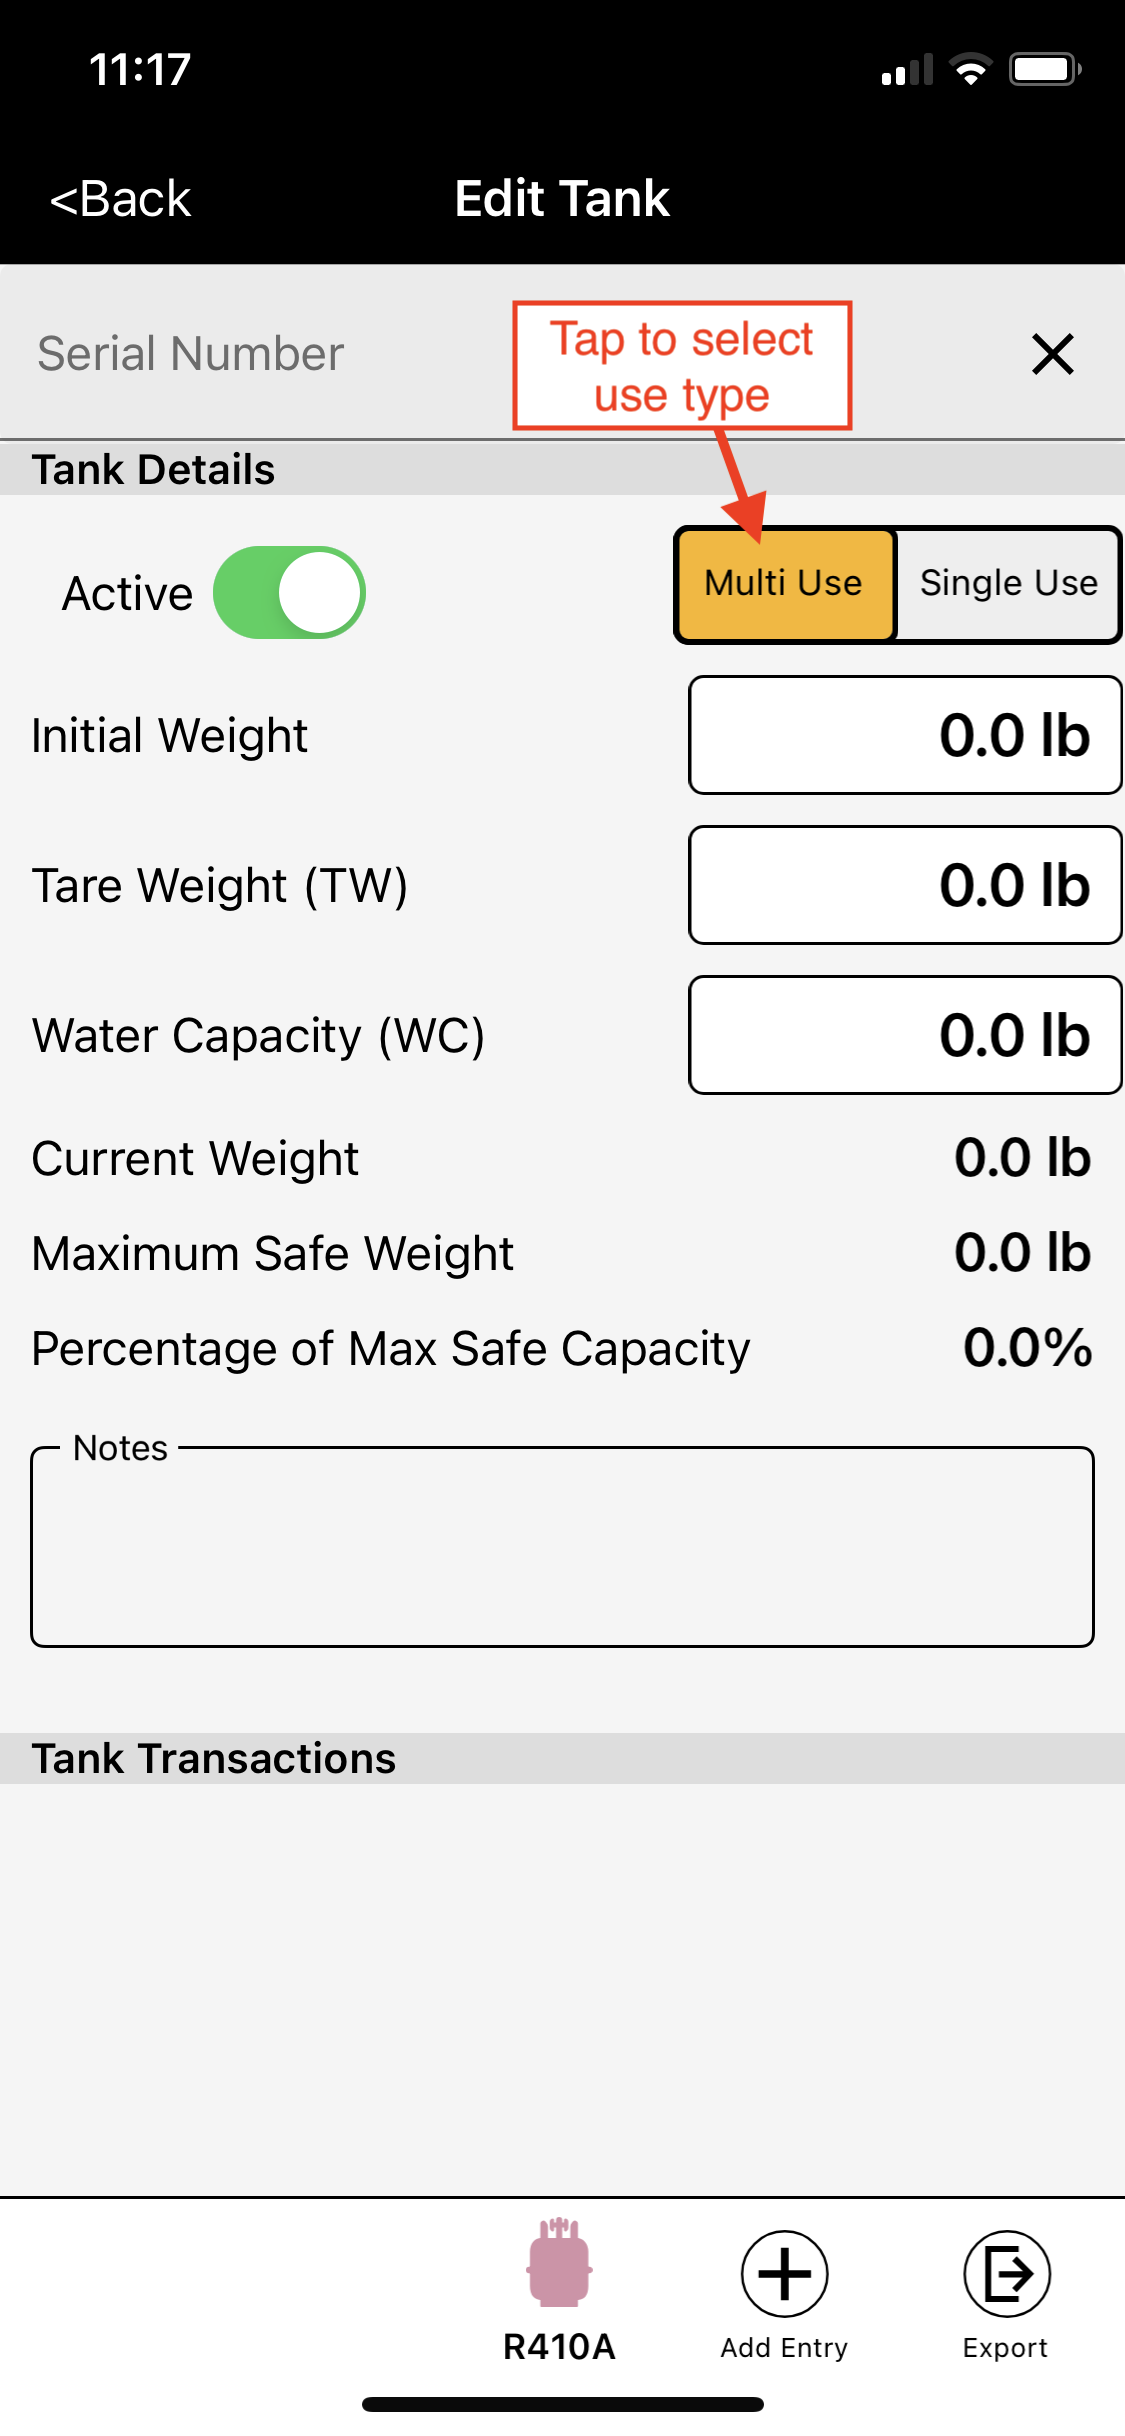
Step 5: Select the Cylinder Use Type
Select the cylinder use type by tapping Multi Use.
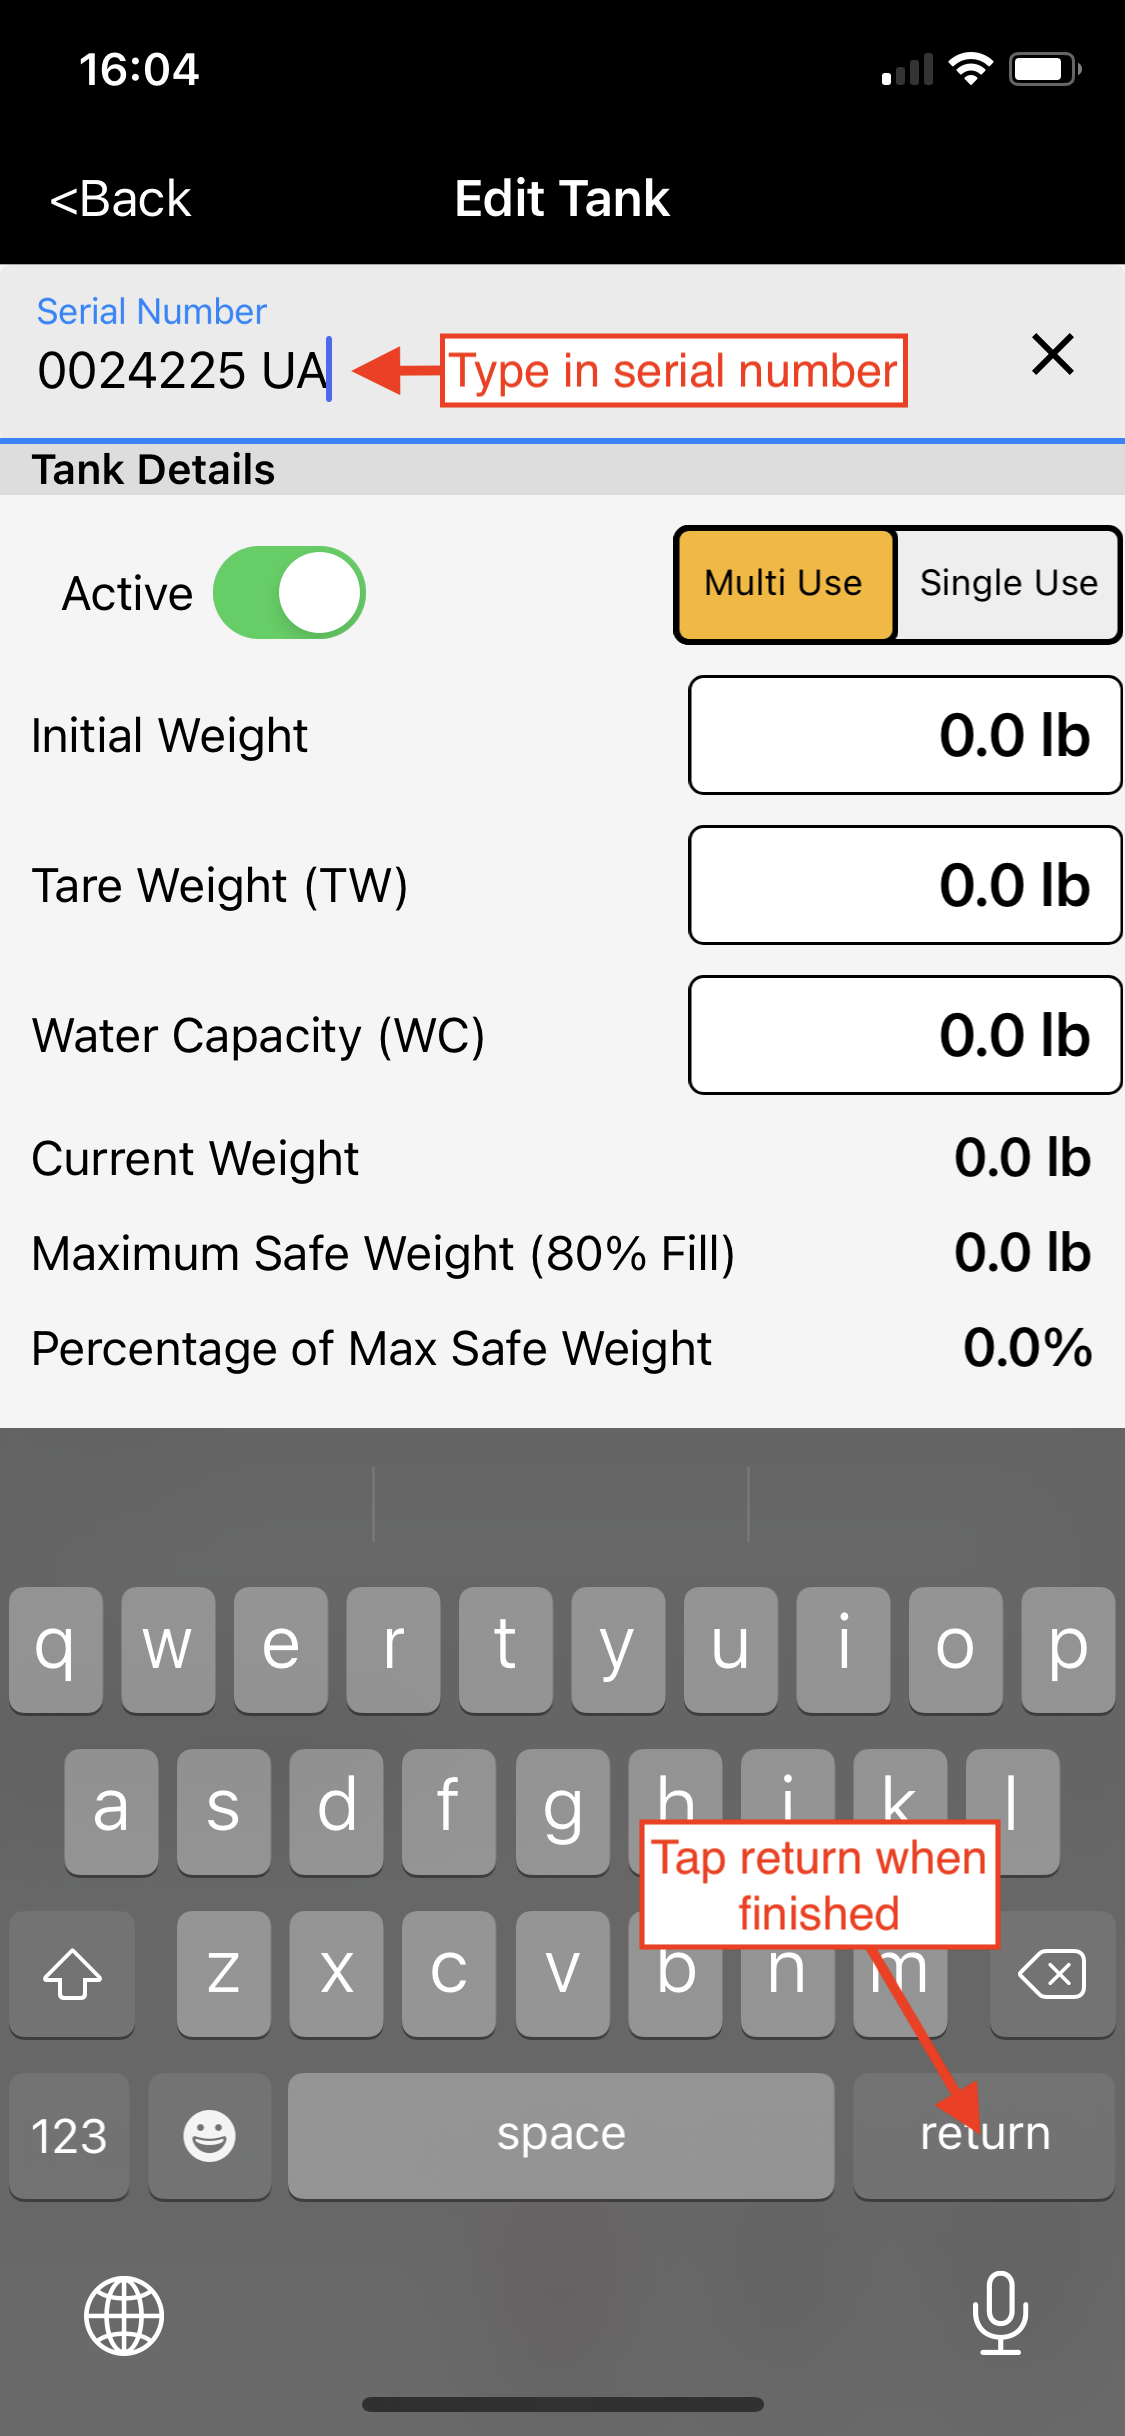
Step 6: Enter the Cylinder Serial Number
Tap the Serial Number field. Enter the serial number, then tap Return to close the keyboard and continue.

Step 7: Enter the Cylinder Tare Weight
Tap the Tare Weight field. You will be redirected to the Tare Weight Entry Screen. Tap the Edit field to enter the Tare Weight listed on the cylinder. Be sure the units are correct, then tap Accept when finished.


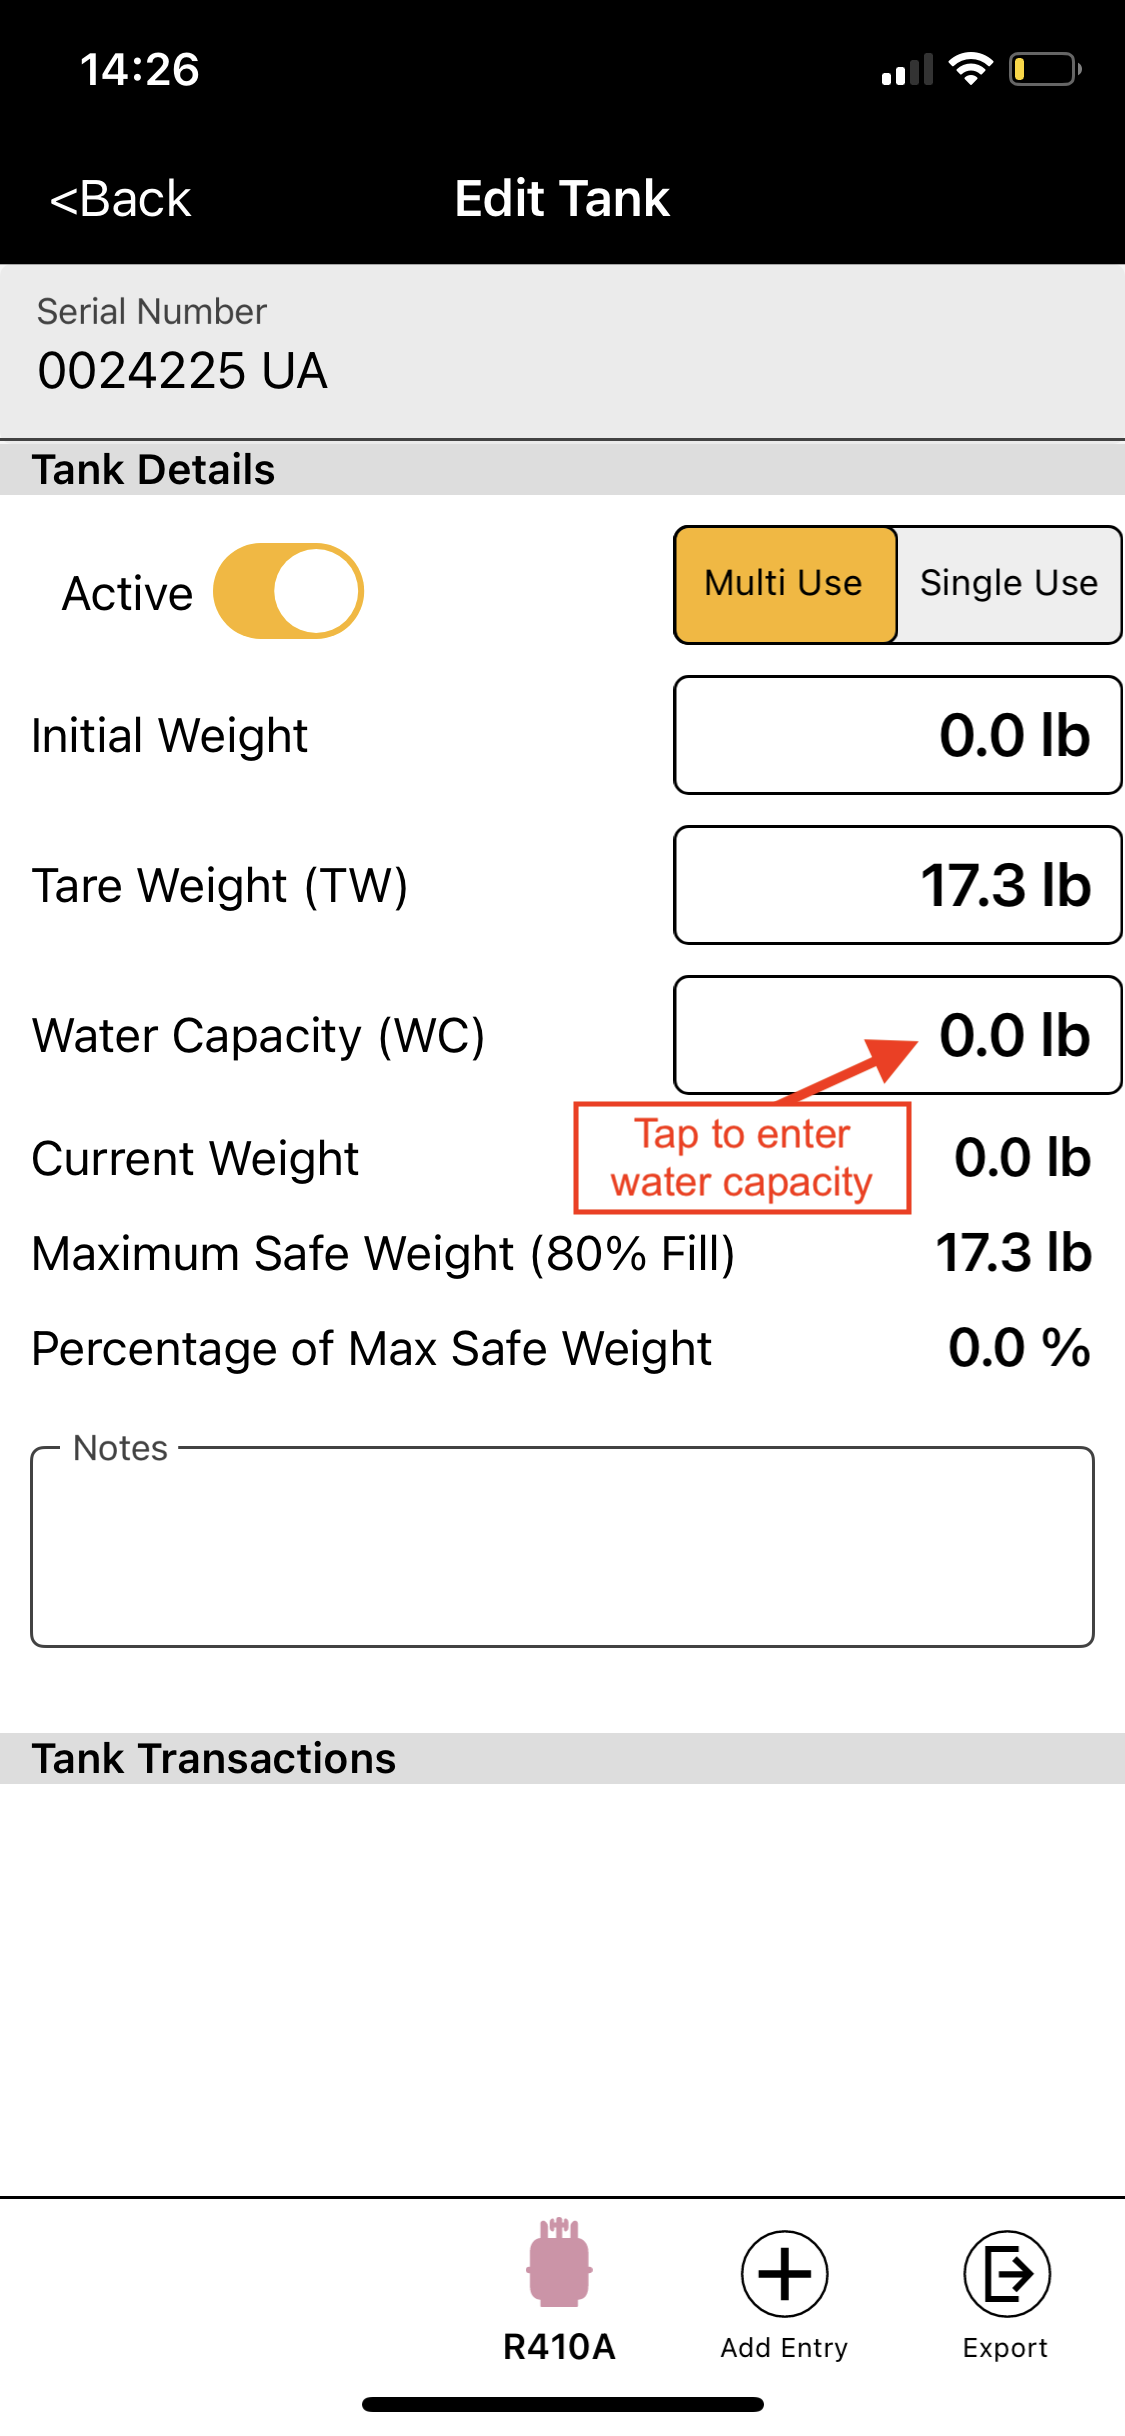
Step 8: Enter the Cylinder Water Capacity
Tap the Water Capacity field. You will be redirected to the Water Capacity entry screen. Once there, tap the Edit field to enter the Water Capacity listed on the cylinder. Be sure the units are correct, then tap Accept when finished.

Step 9: Verify Information and Lock Cylinder
Verify the selected and entered information is complete. Tap the Back arrow to lock the information and activate the cylinder for use within the app. This action will redirect you to the Tank Manager.
Please Note: Once Step 9 is completed, the serial number, tare weight, and water capacity will be locked. If the information is incorrect after the cylinder has been locked, you will need to delete the cylinder and start over.

Step 10: Verifying a Cylinder Has Been Successfully Created
If the cylinder was successfully created, it will now appear in the Tank Manager and can be used within the app.

SAFETY WARNING: Use only DOT or UL approved storage containers for refrigerants. Appion, Inc. does not set safety standards and does not certify or guarantee the safety of any refrigerant cylinder. Read and understand all danger and warning labels located on the refrigerant cylinder. For safety reasons, it is very important to fill all cylinders by weight in accordance with the supplier's instructions and guidelines. Never assume the weight of a refrigerant cylinder. The Appion Central App measures for 80% cylinder capacity at 130°F.